
We designed a removable, plywood sleeping platform with storage underneath for our Toyota Hiace van. It’s comfy, it’s warm and we’re delighted that all the pieces actually fit. So I’d like share our downloadable, open source designs with you, just in case you want to do it too. Or in case you want to make it better.
This bed design will suit van-dwellers who fit the following criteria:
- You bought a regular van to live in for a temporary period of time i.e. more than a few weeks, less than a year.
- You’d like to build an easily removable bed so the van has more re-sell options when you’re finished living in it, or so that you can use the van for other things.
- You’d like a ton of storage under the bed
- Your van has floorspace that will fit a structure 1500mm wide by 1900mm long
- You’re not way way over 6ft tall (Chris is 6ft and it fits him perfectly).
If this is you, go ahead and download the Sketchup file from GitHub. All measurements are included to-scale in the document.
Here’s the method.
Buy the plywood sheets and cut the pieces.
I wrote a post about our design process over here. We purchased our non-construction grade plywood from Bunnings in Wellington, New Zealand. It comes in sheets of 2400mm x 1200mm, 18mm thick for $61.99 NZD, per sheet (~ £29 GBP, $42.70 USD). Get a person with an accurate saw to cut all the pieces from your template. Do not get Bunnings to cut it, they don’t have an accurate saw.


Nail the support rails
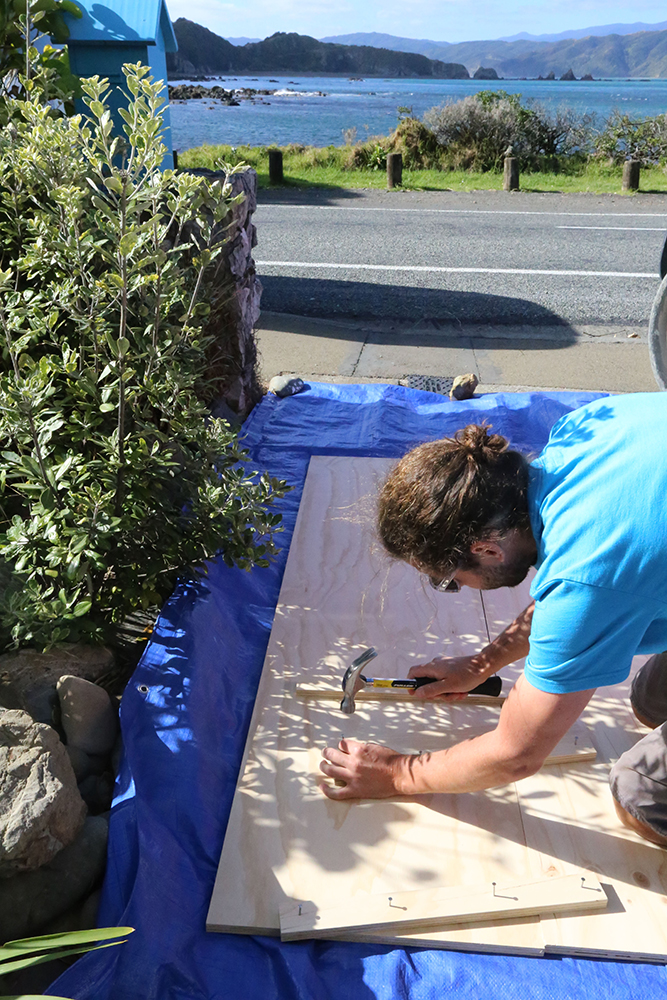
These support rails are designed to hold the plywood legs in place without any screws. Juuust like a 3D bed-jigsaw. We originally wanted to glue the support rails, but it would need to be clamped for 24 hours while we waited for it to dry. We opted for nails in the end and Chris spent a good few hours lining them up neatly and smashing them in place. We stayed at an Airbnb in Breaker Bay while we did the work.
Assemble the pieces – look, no screws!
This is our original 500mm base leg height design, before we decided to pop a proper mattress on top (instead of a cheap bit of foam). Once the frame was up, it quickly became apparent that it would be too high to sit at the end of the bed comfortably when a decent mattress was added. So the next day, we asked our cutting guy to lop an extra 100mm off the base.
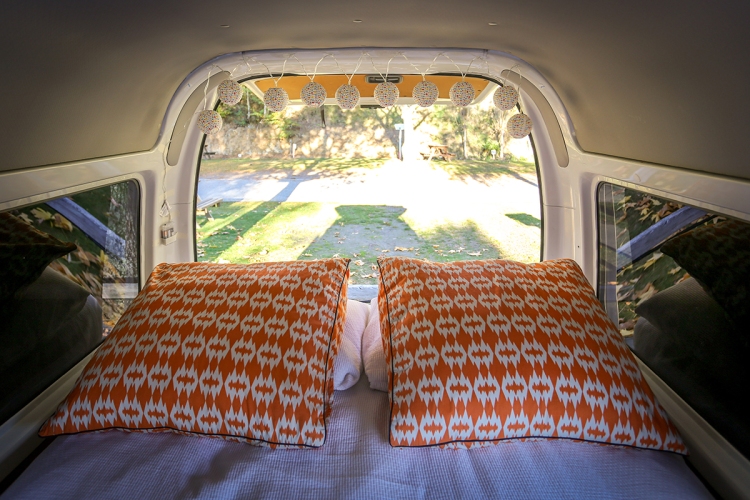
Get yourself a decent mattress, some comfy bedding, a set of drawers and Bob’s your uncle.

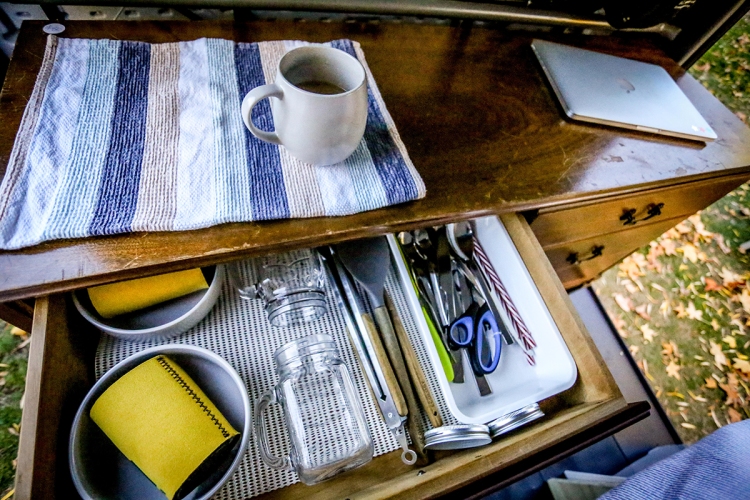
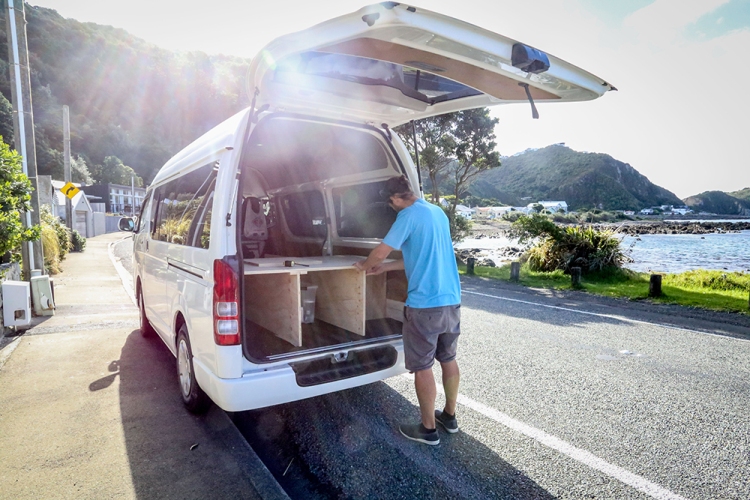
There’s 6 drawers in total, the left side is full of our plates, bowls, cutlery and pots. The right side has food and our gas burner.

We keep our clothes packed in packing cells in these plastic tubs with lids. They roll away in the front compartment, away from any damp. The esky/cool box sits in the middle compartment with our giant, empty travel bags stowed behind.

There’s a few pros and cons to this design.
Pros
- It’s easily removable. Our van is a chameleon. Want to transport big things? No problem! Just un-assemble, move your thing, then re-assemble. No screws. Everything locks into place under the lids.
- It’s relatively cheap. I dare you to search for how much a rental campervan costs for a few months travelling around New Zealand. Go on.
- We’ve got more storage and living space than our original camp bed set-up. This is one of the biggest pros for us. Our new beds fit much more snugly over the wheelbase toward the back, so we now have more space at the front. A perfect spot for this second-hand set of drawers we picked-up from a charity store in Wellington.
Cons
- Not-so-easy-to-access middle compartment. Accessing the middle compartment is a two-person job, normally with me holding up the mattress while Chris lifts the middle bed-lid. It would be great to access it through the front or the back, but the sturdiness of the base would be compromised. You could possibly fix this by building a solid frame, but the design would lose some jigsaw qualities.
- It’s probably too high. The 400mm height + a mattress means my legs still dangle over the edge, but we do get loads of storage underneath. It’s a trade-off. When we eventually build the desk, I’ll probably need to pop my feet up on a box to work comfortably (I’m average height).
I am genuinely interested in hearing from anyone who uses the design and/or makes it better. Get in touch! Especially since we’re thinking about converting another van when we return to the UK in a few months. The best way to post improvements to the design is by using GitHub, but if that’s not your style, I’d be happy to publish updates on your behalf.
So there it is. ‘Night ‘night.

This is really cool, I like how you have made it pretty inside. We have been living in a van and traveling across NZ for over 3 years (with breaks) but in much smaller car. So we didn’t have enough space for drawer and other things. Love that vintage set of drawer you got there 🙂 Truly a vanmaison!
LikeLike
Thanks Barbaria, small details are what makes it home :). The hanging paper lanterns were a $10 NZD find in a hardware store. The cushions were on sale in a random homewares store. When you’re scrimping, the small luxuries make all the difference. Wow, reading your blog now, Samoa! Nice!
LikeLiked by 1 person
Wonderfully helpful post Amy. Curious to know what size mattress you managed to fit in there. I’m also in New Zealand and thinking of buying a van to make the most of the New Zealand summer! 🙂
LikeLike
Hi Laura, so glad you find the post helpful! We found a really nice double mattress from the charity store in the end. With the standard Toyota Hiace width, we would have probably squeezed in a Queen sized (150cm ish wide). But the double suited us fine and left a little room either side of the mattress for bottles of water, phones and to tuck the covers in. So jealous of your NZ Summer! We’re back in the UK now, I wish I was coming back for the season.
LikeLike
I’m in love. This is my dream someday. 🙂
LikeLiked by 1 person